MODULE 2 - SECTION 2 - DORSAL VIEWS of the BRAINSTEM
DISSECTION 1
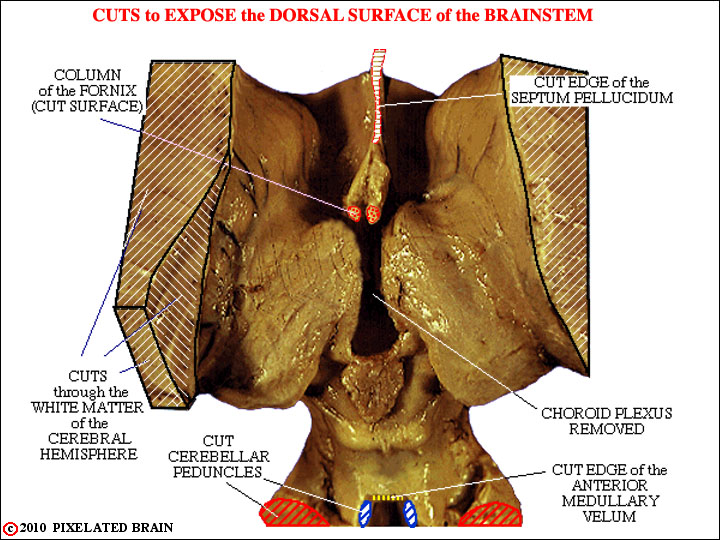
This view shows how the cuts were made in the first dissection.

DISSECTION 1:
The choroid plexus, which normally forms the roof of the third ventricle, has been removed. This allows us to "see" the CSF as it passes from the lateral ventricle, through the interventricular foramen and into the third ventricle. CSF (green stippling) is shown if the anterior horn of the ventricle, but "removed" from the body of the ventricle, so that we can get a good view of the dorsal surface of the thalamus.
Two views from Module 1 that might be helpful are:
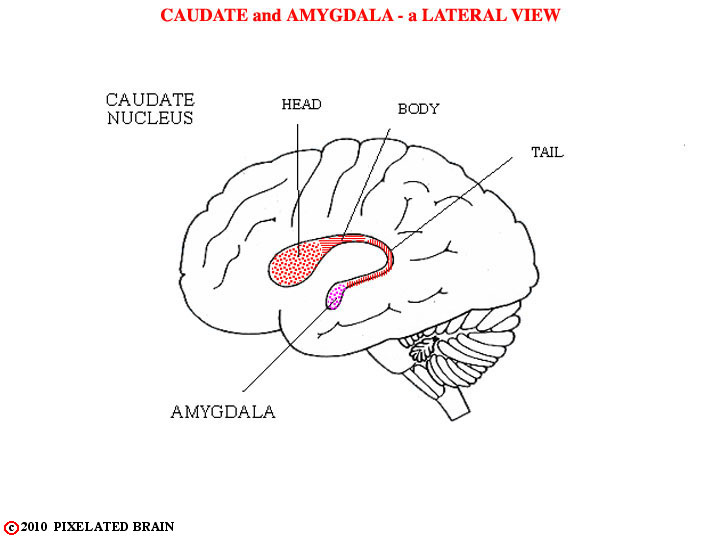
Caudate Nucleus
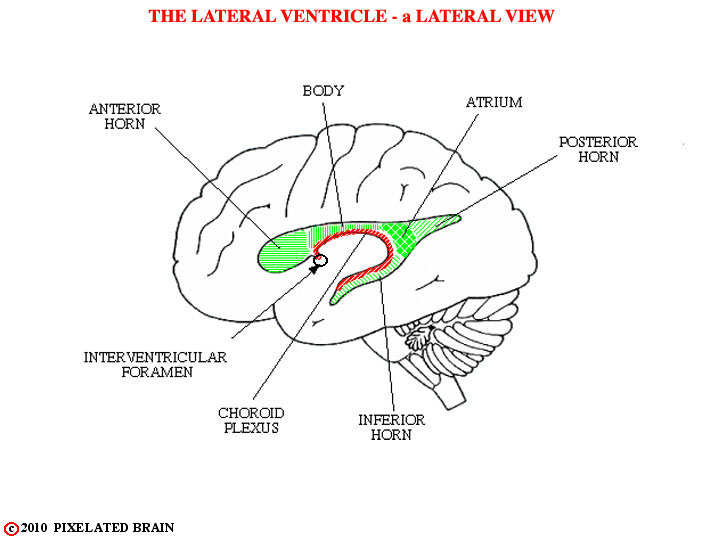
Ventricular System
For similar views, see:
DiganatA_5.6
DiganatA_5.7
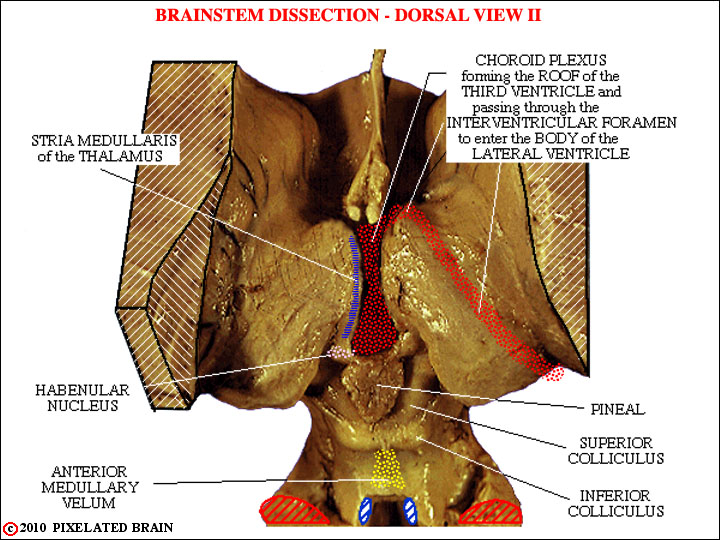
DISSECTION 1:
We see the course of the choroid plexus; Familiarize yourself with these structures :
1) the septum pellucidum. This thin membrane runs between the corpus callosum and the fornix and separates the anterior horns of the two ventricles from each other.
2) the caudate nucleus (previous slide).
3) the stria medullaris (of the thalamus). This is a longitudinal bundle of axons which also marks the point of attachment of the choroid plexus that normally roofs the third ventricle (but is removed in this dissection).
4) the habenular nucleus.
5) the pineal.
6) the anterior medullary velum. This membrane forms the roof of the anterior part of the fourth ventricle.
7) the superior and inferior colliculi.
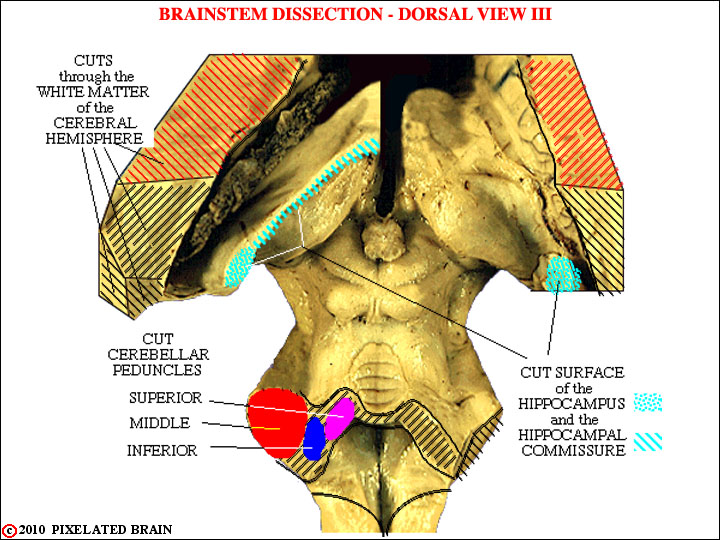
DISSECTION 2:
This second dissection was photographed at a slightly different angle, thus revealing more of the brainstem.
Here, we see how the cuts were made. In this instance part of the fornix and related structures (the hippocampus and hippocampal commissure - don't worry about them, for now) were left in place on the left side, partially obscuring the dorsal surface of the diencephalon.
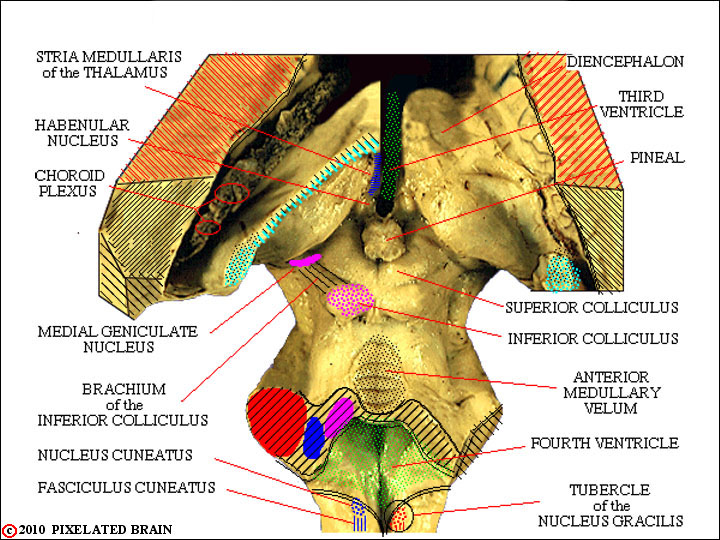
DISSECTION 2:
More structures!
Move back and forth between these two views of the second dissection and make sure you can find the following:
1) the choroid plexus. You should realize that our dissection has exposed much of the lateral ventricle, as well as the dorsal surface of the brainstem. The choroid plexus remained behind, when the hemisphere was removed, and can be seen passing around into the inferior horn of the ventricle.
2) the diencephalon. The more caudal part of the diencephalon tends to "overhang" the midbrain and may obscure it from view . In this figure this part of the diencephalon has been shown on the right but "removed" on the left to reveal underlying structures.
3) the brachium of the inferior colliculus. One of the many bundles of fibers which happen to run on the surface of the brainstem and therefore create an identifiable surface landmark. Brachium is one of several names used for structures of this sort.
4) the superior, middle and inferior cerebellar peduncles. Here we see the cut surface of the peduncles. They are, in a sense, embedded in surrounding tissue, and thus their borders are not easily defined in the photograph. Refer also here.
5) the fourth ventricle. It is exposed to view because the cerebellum and choroid plexus have been removed.
6) the nucleus cuneatus, fasciculus cuneatus and tubercle of the nucleus gracilis. These structures lie at the most caudal level of the brainstem, where the medulla becomes continuous with the spinal cord. The tubercle is simply the surface bump, created by the underlying nucleus.
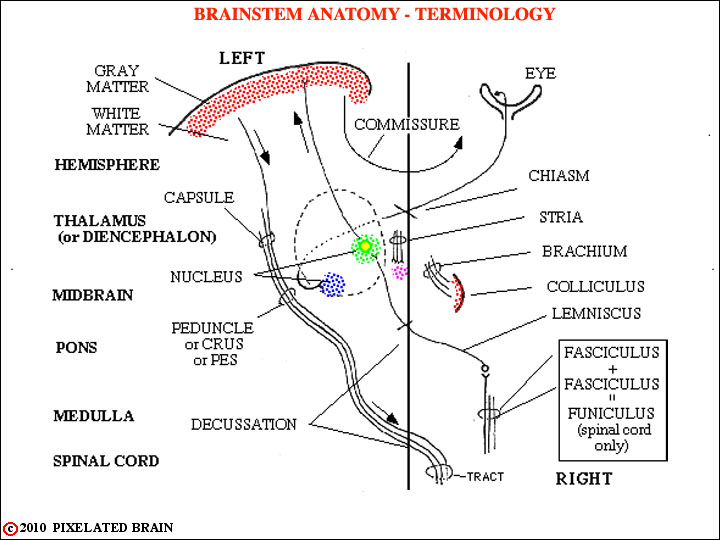
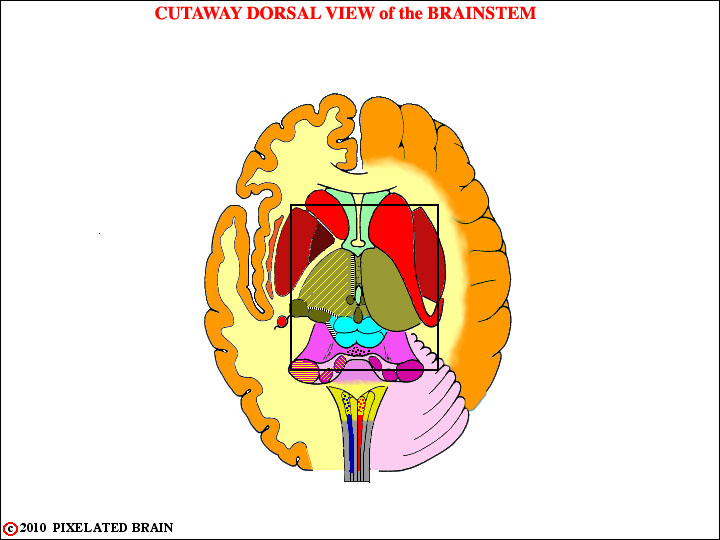
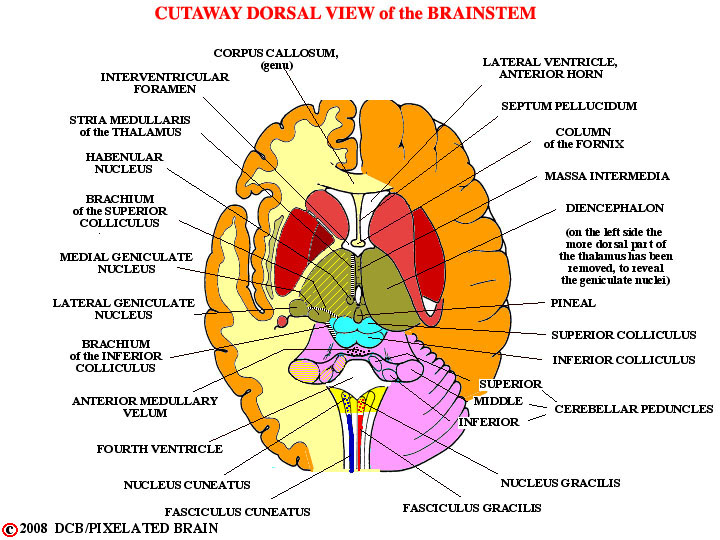
This is a highly schematic "phantom" view of the brain, and we are looking down from above.
The brain levels are shown on the left. All the brain has been scooped out, leaving behind only a few choice structures. If you can't visualize the anatomy, don't worry about it. The aim is just to introduce you to a variety of terms we will use as the module progresses.